fbpx
house painter, Interior Painters ,Exterior Painters
Written by Colleen Kalil

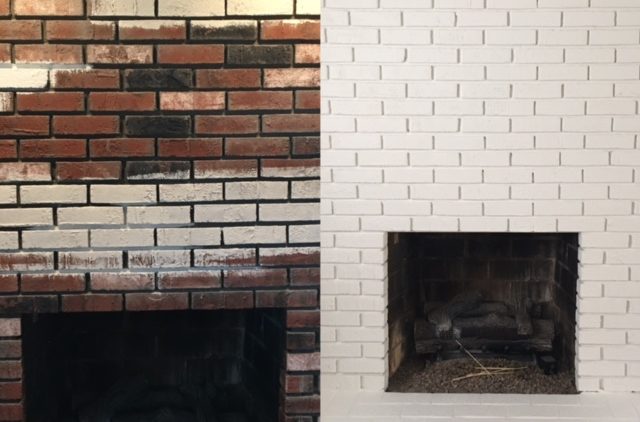
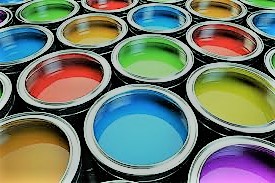
Painting Concrete or Brick Surfaces

house painter, Interior Painters ,Exterior PaintersPainting is a great way to change the look of any surface, whether it’s inside or outside. Almost anything can be painted, including concrete and brick. With the proper equipment and knowledge, you can add to your home’s value and curb appeal.

Concrete Slabs (such as garage floors)

Before you paint a concrete floor, make sure no moisture comes through the slab. Tape around the floor where it meets the wall and wait for a few days. If there’s moisture on the tape, it’s best not to paint it.

If moisture isn’t a problem, sweep out any dirt and debris and wash the floor with a non-residue cleaner. Remove any old, flaking paint and grease spots. Next, etch the floor’s surface with a muriatic acid solution. Follow the manufacturer’s instructions and make sure you have good ventilation. Do not use it in a closed-in space.

Use a latex primer and paint specially made for concrete. Let the primer dry before applying the paint. Follow the manufacturer’s recommendations for both.
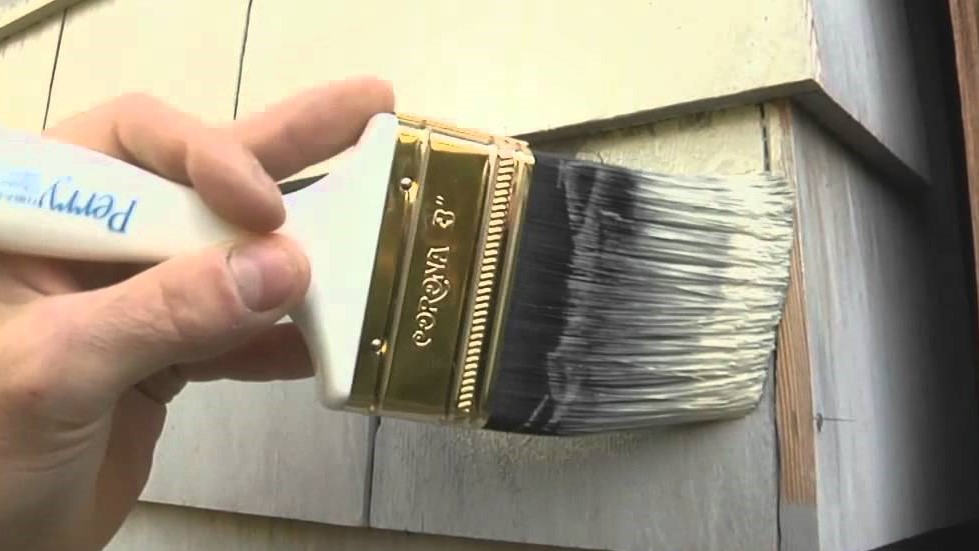
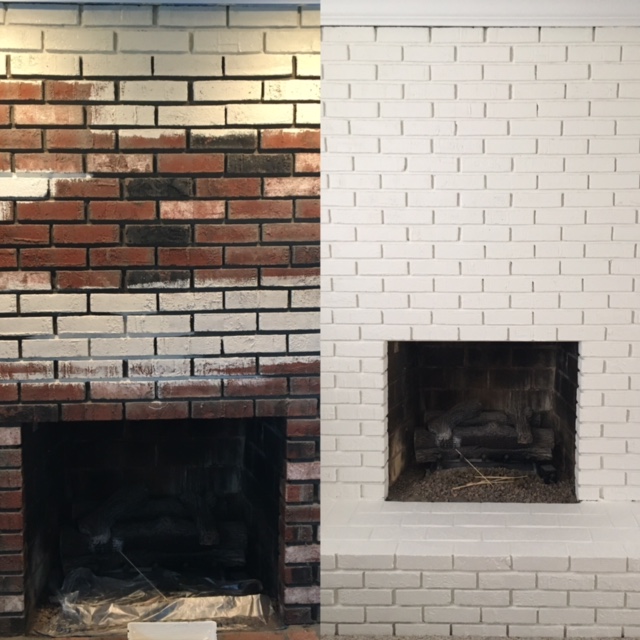
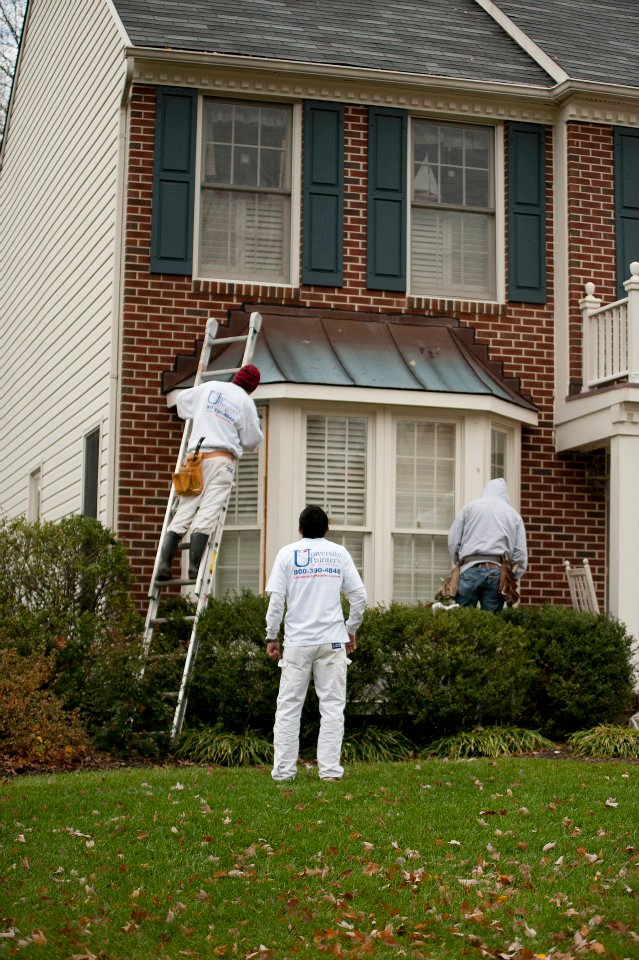
Brick

Before you paint brick, remember it’s a one-time decision. It is nearly impossible to remove paint from brick. Make sure it’s a step you want to take.

The best way to begin any painting project is with a clean surface. Use a wire brush to remove heavy dirt or debris and then wash with a solution of warm, soapy water. If you’re painting an entire house, you might be tempted to get out the power washer. That’s not a good idea; you’re likely to end up with gouges in the brick and you’ll damage the grout. Use a wire brush to spot clean and then use a regular hose to clean the area. You can get a foaming sprayer and then go over the surface again with plain water. Let the brick dry completely.

Use a quality latex primer as a first coat and let it dry completely. Next, apply latex paint for masonry using a long nap roller; use a brush to cover the grout. Don’t be in a hurry. Watch for dripping paint. Two coats are recommended for the best results.

University Painters can help you achieve the look you want for your home’s interior or exterior. Contact us today online at University Painters or call 800-390-4848.

exterior painting, home painters, paints
Written by Colleen Kalil

Grill Safety

exterior painting, home painters, paintsOutdoor grilling is one of the best things about warm weather. Before you slap on the steaks, make sure the grill is ready to go. Here are five easy steps to make outdoor cooking a breeze.

1. Keep the grill at least 10 feet away from your house. Whether you use charcoal or gas, maintain a safe distance from any portion of your home that is flammable. Also avoid overhangs, awnings, pergolas, or other patio covering. Don’t grill inside a garage or under a carport, even if it’s raining. If you have vinyl siding, placing the grill too close to the house can permanently damage your siding and lead to costly repairs. If your home is painted, it can cause blistering and chipped paint.

2. Keep the grill clean. The grill should be cleaned after every use for health and safety reasons. The most important reason to keep the grill clean is to prevent grease fires or flare ups. Stuck on food attracts insects, which isn’t sanitary. Keep pets away from a grill, whether it’s on or off. Dogs especially may be attracted by dripping grease or morsels of food that drop around the grill.

3. Check for gas leaks. Maintain hoses to keep them from cracking and leaking gas. Be sure to check around the top of the propane container as well as the hose. Mix up a solution of dish soap and water and spread it on the fittings and hoses, then turn on the gas. If you see bubbles, fix the problem before you start using the grill.

4. Keep the area around the grill clear of overhanging branches, flower baskets or planters, and decorations. Anything hanging over or around a grill is a fire hazard.

5. Keep a fire extinguisher and spray bottle of water handy. It never hurts to plan. Use the spray bottle to put out any small flare ups. Make sure you know how to use the fire extinguisher BEFORE there’s a fire. It won’t help if you have to stop and read the directions while your house goes up in flames.

University Painters provide quality services to keep the interior and exterior of your home looking its best. Call us today for a free estimate or to learn more about our services. Have a safe and happy summer!

exterior painting, interior painting,painters
Written by Colleen Kalil

Know Your Paint Properties

Summer is often the best time to rejuvenate your home. The process of revitalizing the look of your house usually begins with covering the outside with a fresh coat of paint. If you are a paint ‘neophyte’ and inclined to head to the hardware store to pick up your supplies, there is something you should know. There are two basic types of paint – indoor and outdoor and you don’t want to choose the wrong one for the job!

Interior and exterior paint are formulated to meet different expectations. Indoor paint is meant to take the assault of daily living – children and pets, sticky fingers and marks of all sorts. On the other hand, exterior paint is manufactured to withstand the elements including everything from sleet and snow to relentless sunshine and heat in the summer.

One of the main differences between interior and exterior paint is the resin with which it is manufactured. In the case of paint production, is it a highly viscous substance that binds the paint to the surface on which it is being applied. It allows exterior paint to resist chipping, peeling and fading. A stronger resin is used in the creation of indoor paint, so it is less inclined to show scuffs and smears.

Exterior paint goes through a process called ‘outgassing’ which means it lets the surfaces on which it is applied to ‘breathe’ and minute particles of moisture to escape. Interior paint does not need this type of outlet but in either case, with indoor and outdoor painting, be sure you have adequate ventilation.

If you are painting indoor surfaces, it is better to choose a glossy finish because they are easier to clean than a matte finish. When washing down a flat paint, it tends to smear, exacerbating fingerprints and scuff marks, while putting the homeowner in a position where they will need to repaint sooner to keep a clean, pristine look.

Painting is a much more sophisticated undertaking than many people realize. A lot of thought and pre-planning must go into the project before you begin. In other words, getting thunderstruck with the idea of painting your house inside and out should be followed with careful reflection before running to the paint store.

May we suggest hiring professionals as an alternative to taking on the task yourself? The paint experts at University Paints would be happy to meet with you at your convenience and discuss your paint project. We have been servicing this community for over a decade! Call us today.

exterior painting, House Painters
Written by Colleen Kalil

How to Know it’s Time to Paint Your House!

exterior painting, House Painters
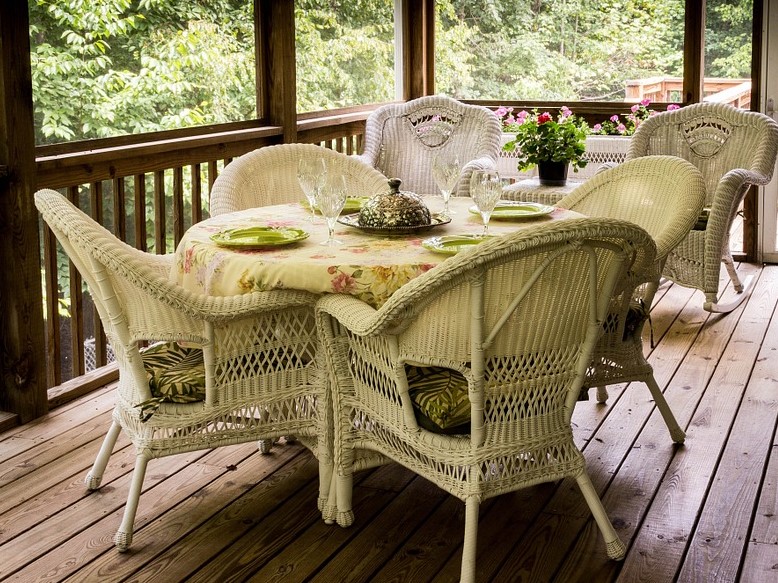
Have you been pulling into the driveway lately and feeling that the house staring back at you seems a bit worn? Is it looking dull? Do the other homes in the neighborhood seem newer and more modern? Perhaps all that you really need is a fresh coat of paint to spruce up the place and make it feel new again – and the same is as true for the inside as outside! Putting a fresh coat of paint on the house or inside is like updating your wardrobe! Here are some sure-fire ways to know when it’s time to paint!

You know it’s time to paint when you see the paint cracking or bubbling. This could actually signal more significant problems underneath the paint such as dry rot or mold. Both of these are issues that will cause long-term and significant damage if they are not addressed.

Check the caulking on the windows outside (and inside). Dried and cracked caulking is also an indication you need to take a closer look at the condition of the home and spruce it up. Upkeep is often cheaper than letting things deteriorate so badly that they cause costly damage to the overall structure.

Is the color of the paint looking dingy? Faded? Perhaps one side of the house gets more sun than the other and that causes discoloration. Weather plays an important role in how the outside of your home holds up. Do a monthly or bimonthly walk around as a way to identify problems with the paint and/or structure.

Paint your home – just because. Because you have lived there for a few years and want a change. Because you found a color you like better and think it will give the home greater curb appeal (you want curb appeal even if you are not selling the home as it keeps its value elevated). Or because it hasn’t been painted in 7 years or more – the recommended amount of time between paint jobs.

While these are the main reasons for painting the exterior, you may decide to do it simply because you want a change. One sure way that can happen is by putting on a whole new color! Whatever your reason for choosing to paint, when the time comes we hope you will call the professionals at University Paint. We would be happy to provide a quote and provide the highest quality service. We look forward to speaking with you.

COMMERCIAL PAINTING, PAINTERS
Written by Colleen Kalil

Commercial Painting Considerations

COMMERCIAL PAINTING, PAINTERSCommercial painting and residential painting are very different projects. There are special considerations inherent in commercial jobs, especially when stationery equipment is involved. Communication with your painting contractor will help the work move quickly and maintain safety for everyone. Plan to have the facilities manager or other employee overseeing the project meet regularly with the painters. Make sure the entire crew knows what type of work your business performs, if you use special machinery and if there are possible hazards such as flammable materials.

Commercial businesses typically have safety procedures in place, and it’s helpful to provide that information to the contractor before the work begins. It’s best to plan to paint when the fewest people are in the building. That may mean painters, and possibly employees, work at unusual times, but the work will go faster, and there’s less likelihood of injury or other interruptions. Professional painters can adapt to the schedule of the business and will plan to have its crew report accordingly. It’s ideal to have the space free of machinery, but that isn’t always possible.

As the business owner or manager, take a few minutes to inform your employees what will be happening, when painters will be on-site, and what accommodations they should plan to make. Avoid surprising your employees with things like limited or no access to parts of the building, fumes or dust that may affect asthma or other breathing conditions, and a longer than expected project schedule.

When you’re hiring commercial painters, ask how much commercial experience the company has. There is a big difference between residential painting and commercial painting, and you want an experienced company with a good track record. Ask how many years the company has been in business and what percentage of their business is commercial.

Make sure the company has insurance. This is basic with any contractor you hire to work on-site. If a vendor you contact doesn’t have liability insurance, keep looking. Licensing is another consideration. They should have up-to-date licensing for your area.

University Painters are experienced, licensed, and qualified to take on commercial painting projects of all sizes. We know our business and will help you get back to your business promptly. Contact us today for a free estimate.

home painters, exterior painting
Written by Colleen Kalil

Small Budget, Big Results

home painters, exterior paintingWarmer weather and longer days mean more time outdoors for most people. Whether you like to entertain family and friends or spend quiet time reading, your backyard can be transformed into a great outdoor living space. Upgrading the outdoor spaces around the home is a popular home renovation project, but you don’t have to spend a fortune to get high-end results. Regardless of the size of your yard, you can create a relaxing oasis without breaking your bank.

Add A Water Feature

There’s nothing more relaxing than the sound of moving water. Adding a fountain to your backyard is an inexpensive way to get an instant atmosphere boost. A fountain can be the focal point in your yard, or it can be part of the overall design. Whichever route you choose, a fountain can have a big impact.

Upcycle Materials

If you look around your home, it’s very likely you’ll find unused material that can be repurposed to create something for your backyard oasis. Old tires can be painted and be used as planters or garden borders, scrap lumber can become a beautiful wooden planter or a small raised garden. Ask family and friends what surplus materials they have as well. You’re only limited by your imagination.

Rock Garden

If you don’t exactly have a green thumb, add a rock garden to your yard. It’s easy maintenance and can be an inexpensive design element. Scout around your yard for rocks to use. Home centers sell a variety of rocks and crushed stone that are fairly inexpensive. Pick out our favorite stone mix and create your very own Zen garden.

Shed A Little Light

Adding even a few well-placed lights can add a sparkle to your yard for very little money. Check second-hand stores for strings of lights and use either clear or color bulbs. Paper lanterns are another inexpensive lighting option that will deliver a big impact. Pierced aluminum cans, glass mason jars, or solar lights offer more lighting choices.

University Painters can be a great resource for your backyard transformation plans. Contact us today for a free appointment at 800-390-4848 or visit our website at universitypainters.com.

exterior / interior painting, home painters
Written by Colleen Kalil

Pressure Washing Around Your House

exterior painting, interior painting, painters
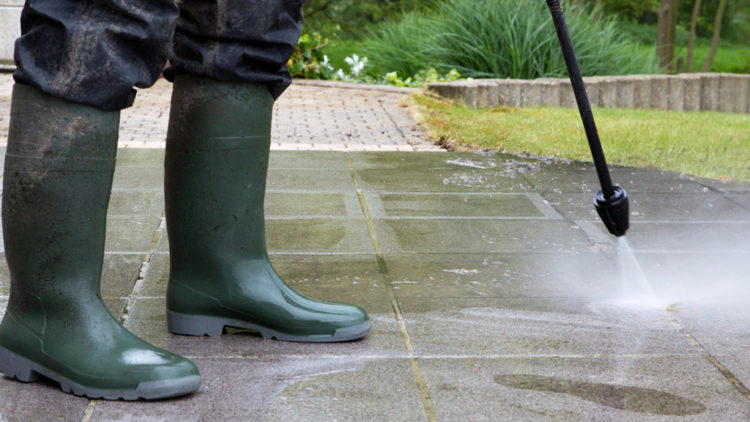
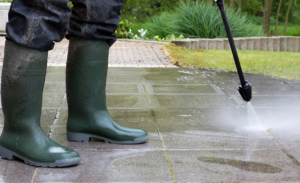
If you think pressure washing is just for your home’s exterior, think again. Pressure (or power) washing is a great way to clean and refresh many large areas quickly. A washer can be used on most any surface. Let’s start with your home’s exterior. As the years pass, your home’s exterior can take a beating. Rain, snow, dirt, birds – well, you get it. Pressure washing is good for cleaning aluminum or vinyl siding, clapboard, brick, or stone. Be careful with wood shingles as the pressure may gouge or damage them and can push water under the shingles causing mildew problems. You can add a mild detergent to the power washer for the first cleaning and then follow up with clean water to take off all soap residue.

Like wood shingles, any wood surface should be treated with care when using a pressure washer. Be sure to use a low-pressure nozzle or you could strip the finish or other coatings off the wood, or oversoak the wood. Proper use of the washer on wood will help you remove dirt, grime, mildew, or other stains.

Metal surfaces such as rain gutters, drains, and fencing are also good targets for a power wash. Even an outdoor grill can be power washed. Don’t hold the jet too close to the surface though to avoid scratches.

Concrete, stone, and brick can also be cleaned with a power washer. Make your garage floor look like new by adding a little detergent to your washer to get rid of grease and oil. Whether your driveway is brick, stone, or concrete, it can be washed too. Never use a pressure washer on asphalt surfaces unless you want to replace it.

Power washing is also off limits for roof shingles, especially asphalt shingles. It’s likely to cause more damage than good including loosening shingles, driving water under shingles, and blowing them off entirely.

Your in-ground swimming pool or a Jacuzzi can be pressure washed. If the washer is able to create steam or use hot water, you can eliminate germs and other contaminants from these vulnerable areas.

University Painters not only paints interiors and exteriors, they can pressure wash surfaces around your home for a cleaner, fresher look. Contact us today for a free appointment.

exterior painting, home painters
Written by Colleen Kalil

Painting Wood Shingles

exterior painting, home paintersWood shingles, especially cedar shingles, can be a popular choice for the exterior of your home. With proper stain, they are long-lasting, weather and insect-resistant. You do have the option to paint shingles, but special preparation is needed. Wood absorbs paint faster than other surfaces and has to be specially primed. Even the best paint will soak into the wood without the proper base.

Because shingles may weather differently, check to see if any are damaged and need to be replaced. Shingles also mildew rather quickly and should be cleaned thoroughly before painting. To prepare singles for painting, the shingles need to be washed to remove dirt and mildew.

To clean wood shingles, a sponge, household bleach, and water are what’s called for. Using a solution of 1 part bleach to 3 parts water, apply the solution to mildewed areas with a sponge and leave for 15 minutes, then rinse thoroughly. Let the shingles dry and be aware that it can take up to two weeks for shingles to dry completely.

When the shingles are dry, use a scrub brush to remove any old wood or dirt and brush the residue off with a wide paint brush. Next, apply a stain blocking primer with a four to six inch brush. Shingles need to be coated evenly. If you choose to use a sprayer, use even strokes moving in different directions for complete coverage.

The final step is to paint. Acrylic latex exterior paint is a good choice and will last for many years. As with the primer, the paint should be applied in all directions and completely cover the shingles. Work in a limited area, approximately 20 feet square, and then move to the next section.

University Painters are licensed, qualified, and knowledgeable about all types of finishes for the exterior of your home. We can work with you to create the look you want for your home. Contact us today at 1-800-390-4848 for an appointment.

home painters, painting, interior,exterior
Written by Colleen Kalil

Get Your Deck Warm Weather Ready

home painters, painting, interior,exteriorFollow these steps to make sure your deck stays in good condition.

Clean between the boards to loosen and lift out any dirt, mud or other debris using a putty knife. Don’t use anything that would damage the wood. Sweep the deck thoroughly. Ensure that you’re using the correct cleaner for your deck. Some require that the deck be wet before the cleaner is applied.

Apply the cleaner with a brush-style broom, garden hose sprayer, or a paint roller. Follow the manufacturer’s instructions carefully. Don’t forget to clean the railings, beginning from the bottom up, and the stairs then rinse thoroughly. If you’re planning to reseal the deck, wait at least two full days.

Check the deck for any large gouges, loose boards, or other signs of wear. If nails have popped up, take them out and replace it with a slightly longer wood screw. If there are any boards with rot or significant signs of wear, replace it. Check railings as well to make sure they’re secure.

Remember to periodically move furniture or planters to clean underneath and prevent rot. Plants should never drain directly onto the deck. Keep a tray underneath each item to catch excess water. Protect the deck from furniture scratches with nylon pads similar to what you would use in the house. Don’t use any natural fibers that can mildew or rot.

If you have a grill on your deck, take a few precautions. Make sure there’s sufficient space around the grill so air can circulate and the heat won’t damage the deck. Protect the wood under the grill with a spatter mat, specifically manufactured for that purpose. Again, clean under the mat regularly to keep dirt and grease from building up. Clean up any spills as soon as they occur.

University Painters are experts in the treatment and maintenance of exterior surfaces. Contact us today for a free appointment at 800-390-4848 or visit our website at universitypainters.com.

home painters, paints, exterior painting
Written by Colleen Kalil

Gates and Fences

home painters, paints, exterior paintingGates and fences may be added to a home for security or purely decorative reasons. Though any number of materials can be used, two of the most common are wood and iron. Both are long-lasting, can add curb appeal and value to your home if they are maintained regularly.

WOOD

If your gate or fence is made of wood, it must receive regular attention to keep it from drying out, splitting or rotting. Many newer fences are made of cedar or redwood, which are more resistant to bugs, but even these woods need care to look their best.

Wood fences that will be below ground level should be made of pressure-treated wood. This wood is chemically treated to withstand mold, mildew, and insect damage. Pressure-treated wood doesn’t need a sealant, but can still be stained or painted for aesthetic reasons.

To keep a wood fence looking its best, keep a few things in mind. Don’t point sprinklers directly at a fence. The water will keep the wood moist and can encourage the growth of mold and mildew. Keep vines off fences because they will likewise add moisture to the wood fence. Keep grass trimmed around the fence.

IRON

Iron fences are a beautiful focal point for a home, and can last for decades, but they have one enemy: rust. To keep an iron fence in good condition, wash it every six months with mild soap and water, followed by a coat of metal wax. If you’re already seeing signs of rust, remove the rust with a fine wire brush and rinse it with nonionic water. Keep latches, hinges or other decorative pieces well-oiled and working. Just as with wood fences, keep weeds, grass, and vines away from an iron fence so the extra water won’t damage it.

CHAIN LINK

Chain link fences are commonly used, durable, and functional. Both coated and uncoated fencing is available. Coated fencing is easy to clean and maintain. Uncoated fencing, like iron, is susceptible to rust and should be checked regularly. The posts holding the fence are usually metal and can be treated the same way. Make sure the posts are at a 90-degree angle with the ground. If the posts aren’t secured in cement, they may begin to lean after a time.

University Painters can help you care for everything around your home’s exterior. Contact us today for a free appointment at 800-390-4848 or visit our website at universitypainters.com.

1 7 8 9 10 11 14